Showing posts with label cheap cosmetics. Show all posts

Tuesday, March 6, 2018

How to Keep Your Homemade Cosmetics?

Mask, cream, lip balm, homemade cosmetics have no secret for you! But do you know how to keep them well? We give you some tips to optimize their shelf life.
To make your homemade cosmetics is to take time to find the right recipe, test the different ingredients and discover their benefits. By creating your own products, you take care of your health and the environment. However, it is important to know some tips to avoid waste! No way to leave your homemade cosmetics mold in the bathroom!

Home cosmetics: more delicate products than others
Homemade face cosmetics are made with natural ingredients. They, therefore, contain no preservatives or synthetic origin. Therefore, it is necessary to be careful when handling them and to observe some simple hygiene rules.

Enemies to be wary of
These cheap cosmetics are often criticized for being poorly preserved. This is not the case, it is enough to know the possible sources of contamination in order to avoid them. The main enemies: bacteria, air, light and too high temperature.

Indeed, micro-organisms (fungi, bacteria, yeasts ...) will come to feed on the molecules contained in the natural ingredients and develop there. To proliferate, they need to be in an aqueous medium. It is for this reason that cosmetics containing water are much more sensitive than others.

As for the free radicals present in the air, they will go to fix the molecules and degrade the whole product. The heat is the light participate in the acceleration of this process. This means that as soon as the product is in contact with the air, the risk of contamination exists.

Rigorous hygiene rules from the manufacturing process
When making your cheap cosmetics, it is important to  follow some basic hygiene rules . Indeed, the ideal would be to achieve them in a sterile place. What is impossible! So take time to thoroughly  disinfect all equipment and worktop  with 90 ° alcohol. For utensils, boil them for 10 minutes in the water. It is also strongly recommended to wear gloves and a mask.

When making your cosmetics and even after when you use them, consider using a clean spatula. Do not forget to always close the caps or covers securely. The more your cosmetics are in contact with the air, the faster they will degrade. So our homemade products, we take care!

Monday, January 15, 2018

10 Step for a Professional Makeup

Get a perfect makeup and professional results with the advice of Gato. Keep reading!

professional face makeup

1.Exfoliate your skin and apply a serum the night before so that your skin is luminous and firm before applying the base.

2.For a daytime make-up, always use natural light and for a night makeup, do it with artificial light and always in front of you, never with ceiling light that marks dark circles and volumes that can confuse you.
3.Mix the base with face cosmetics to make it lighter. The imperfections that are still visible can camouflage them later with a concealer.
4.There are three key areas that you must illuminate that are: center of the forehead and chin, under the eyes and the top of the bone of the cheekbone.
5.And three areas that you should sculpt with bronzing powder: both sides of the forehead towards the temples; under the bone of the cheekbone and under the line of the jaw.
6.Always use eyelash curler: not even the best eyelash mask lifts and curls as much as a professional curling iron. Also, do not believe the cheap cosmetics that break the eyelashes.
7.Beam balance between bright areas and mattes. For example, if your skin likes matte, use bright shadows or lipsticks and vice versa.
8.No makeup will look professional if your eyebrows are not perfect. If you are crafty, define them with a pencil; if not, it is enough that the combs and fixes with the brow mask Brow Drama so that you will give a professional face makeup.
9.Mattifies only the brightness of the center of the forehead, chin, tip of the nose and nasolabial fold. The rest of the glitters will help your skin look fresh and hydrated.
10.The nails are as important as the face so wear them in line with the makeup, or in a tone similar to that of the lips; natural if you want to subtract sophistication from your total look; or in a special tone if you want to brighten a natural makeup or too sober.

Wednesday, January 3, 2018

Beautiful Eye Makeup Guide

Eyes play a great role in your facial beauty. Your eyes reflect your emotions and attract attention as per you makeup. It is tough and tricky to decorate your eyes as per the season. Appealing eye makeup requires skill that requires practice, right cosmetic kits, and patience. In this article, we will learn how you can place the eye makeup with skill and art.

 cheap cosmetics

Step 1: Clean your eyes
Initially, it is important to clean your eyes as you need a perfectly clean canvas for your decoration. Try to wash your eyes with moderately warm water as hot water it may dry your skin around eyes. To remove any oily residue wash carefully.

 cheap cosmetics

Step 2: Identify your eyebrows
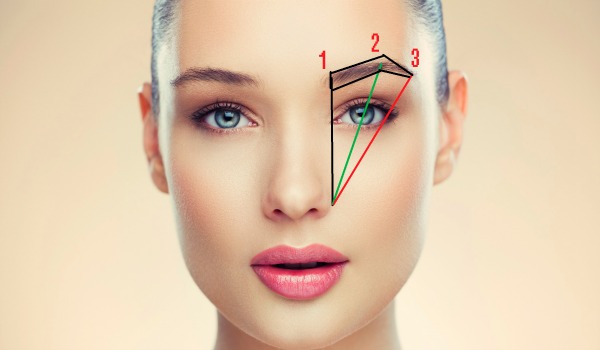
Eyebrows help to achieve the uncluttered makeup. Remove excess hair from your eyebrows and refine your eyes and gently comb your eyebrows. Mark the eyebrows by placing a light degree of your natural hair color and spray a small amount of hairspray to fix them.

 cheap cosmetics

Step 3: A primary makeup
After cleaning your eye our primary motive is that to make sure eye makeup goes on smoothly and stays till a certain period of time. Primary makeup generally contains Silicon that smoothens the lines and wrinkles around eyes that can make your makeup uneven. You can easily find cheap cosmetics at a drug store for your primary makeup.

 eye makeup set

Step 4: Adding the Shadow
Depending on the skin tone and your outfit add different dark palettes to the inner and outer corners of the eyes. This pattern is very adaptable and can be used with different eye shapes. Stiff brushes easily pack color onto your eye that helps in getting a darker and solid pattern. The key for adding depth to your eyes is to brush the dark color into your eyelid furrow. Use the small brush in your eye makeup set to get the color into tiny wrinkles without smirching it all over.
For the eyes to look bright and large add the lightest color to the center of the eyelid. Use a stiff brush for this step so that it will pack on the color and will make its covering perfect by covering the center of the eyelid with a light color.

 eye makeup set

Step 5: Blend all colors together
Gently and slowly blend each and every color within them so that entire looks absolutely svelte. Blending should be done with a soft brush.

discount cosmetics

Step 6: Lashes and Brows
Apply eyeliner to your eyelashes as closely as possible. The line could be darker and thicker as per your decoration. If you want to achieve more dramatic eyes put one layer of mascara immediately. Depending on your eye shape use different techniques for a different look. Start from the base to apply mascara to your lashes with your discount cosmetics. Slowly move to the end and slightly fiddle back and forth.
discount cosmetics